
 Egypt
Egypt  Saudi Arabia
  USA
USA How to Use a Bottle Sterilizer the Right Way
We may earn a commission from purchases through our links, at no extra cost to you. How we choose · Disclosure.
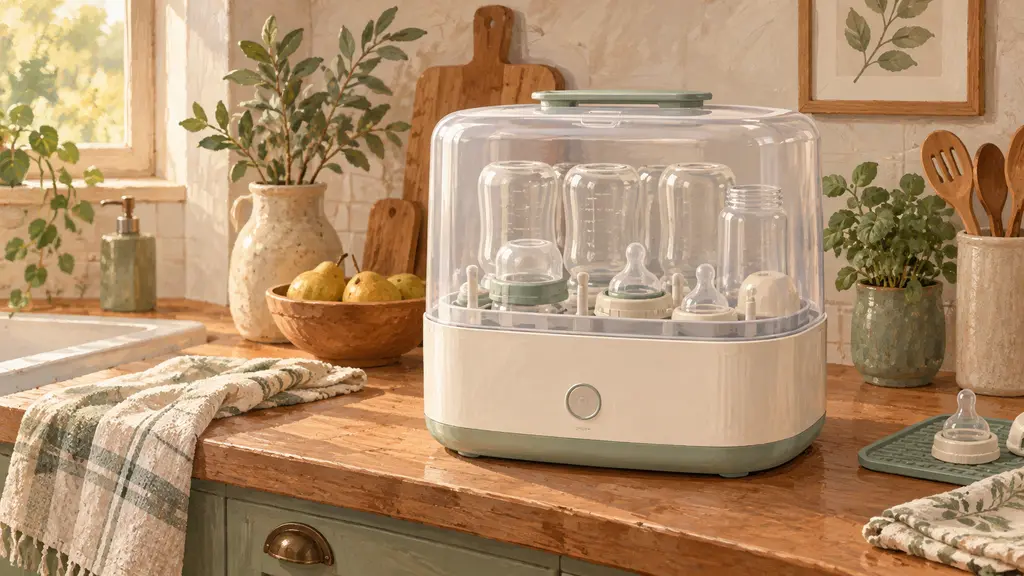
Wash bottles and nipples thoroughly with water and soap first, then arrange them in the sterilizer as your model’s manual shows, add the exact stated amount of water, and run the full cycle without opening the lid before it finishes. After sterilizing, avoid touching the inside surfaces of bottles with your bare hands so you don’t recontaminate them. These simple steps are the difference between a bottle that’s actually sterile and one that went through a cycle without coming out as clean as you’d assume.
The quick answer
Always wash bottles before sterilizing, add exactly the water amount stated in your model’s manual, arrange the parts as the manual shows, and run the full cycle without opening it early. Once the cycle ends, handle the hot, sterile parts with clean hands or a dedicated tongs, and avoid touching the inside surface of a bottle or nipple directly so it doesn’t get recontaminated the moment it comes out sterile.
Key points
- Sterilizing kills germs on a surface that’s already clean, it isn’t a substitute for washing with water and soap before the cycle (sterilization background from US CDC).
- The right water amount matters: too little can stop the cycle from finishing, and too much can overflow the base.
- How you arrange the parts affects how steam reaches them: open bottles and nipples with openings facing the direction your model’s manual specifies so steam can get inside (baby bottle background from US CDC).
- Touching the inside surface with bare hands after sterilizing can recontaminate it, so wash your hands or use a dedicated tongs.
- Cycle length varies by model, check the manual or product listing for the exact time on your unit.
Wash first, then sterilize
A step that gets skipped often: sterilizing doesn’t remove dried milk or food residue, it’s designed only to kill germs on a surface that’s already clean. If you put a bottle with leftover milk residue straight into the sterilizer, you’re sterilizing that residue in place, not removing it. Wash every part thoroughly with warm water and dish soap or a dedicated bottle cleaner, rinse well, then move on to sterilizing.
Water amount and arranging the parts
Most electric steam sterilizers need a specific water amount, usually marked with a line inside the base or measured with a cup that comes with the unit. Add exactly what your model’s manual states, since too little water can stop the cycle before it completes or keep it from sterilizing every part evenly, and too much can overflow the base or lengthen heating and evaporation time.
When arranging bottles, nipples, and rings, always follow your model’s manual: most sterilizers ask for bottles to sit upside down or with openings facing a specific direction so steam reaches inside fully, and for small parts like nipples to sit in a separate basket or holder so they don’t fall or get blocked from steam by something larger on top.
Running the full cycle without interrupting it
Once you press start, let the cycle run to completion without opening the lid to check on things halfway through. Opening the lid early lets outside air and germs into the unit before sterilizing finishes, and on some models it can force you to restart the whole cycle. If your sterilizer includes an automatic drying stage, let that finish too instead of pulling bottles out while they’re still damp partway through.
After the cycle: handling sterilized bottles safely
This step gets overlooked by a lot of parents: once the cycle ends, bottles and nipples are genuinely sterile, but touching the inside surface with your bare hands recontaminates it immediately, since the natural oils and germs on your skin transfer easily. Wash your hands thoroughly with water and soap before handling the sterile pieces, and try to hold them only by the outside surface. Many parents rely on a dedicated tongs to lift hot bottles and nipples straight out of the sterilizer without touching the inside surface with their fingers at all, a simple practical fix for this exact step that doesn’t require a new appliance in the kitchen, just a small, inexpensive tool made for this purpose.
Step by step: from dirty bottle to sterile bottle
- Wash the bottle, nipple, and ring with warm water and dish soap, and rinse well.
- Add the exact water amount stated in your model’s manual to the sterilizer’s base.
- Arrange the parts as the manual shows, with nipples and rings open and openings facing the correct direction.
- Run the full cycle, and don’t open the lid before it finishes, including any drying stage.
- Wash your hands or use a tongs before removing the sterile parts, and avoid touching the inside surface directly.
- Use the bottle or store it closed according to your maker’s instructions on how long it stays sterile.
A sterilizer that makes correct use easier
A unit with clear steps and parts that don’t demand complicated arranging cuts down the chance of a mistake each cycle. A practical example from our shortlist: the Philips Avent Premium bottle steriliser and dryer sterilizes and dries in the same cycle, so there’s no extra decision about when to pull bottles out, they come out ready straight from the unit. We didn’t pick it for being the cheapest, we picked it because it’s a genuinely reliable sterilizer backed by thousands of buyers on Amazon.ae, which is why it tops our guide to the best bottle sterilizer in the UAE.
Bottom line
Using a bottle sterilizer correctly comes down to a few basics: always wash before sterilizing, add the right water amount, arrange parts as the manual shows, run the full cycle without interrupting it, and handle sterile parts with clean hands or a tongs instead of touching the inside surface directly. If your sterilizer stops working or won’t finish a cycle, see our guide to bottle sterilizer not working, what to check, and if you’re noticing a smell or buildup, read how to clean a bottle sterilizer and how often. And if you’re still weighing steam sterilizing against boiling on the stove, see steam sterilizer vs boiling. For the full buying criteria across baby appliances, read how to choose baby appliances, or browse our baby appliances section.
Sources
- US CDC, “Cleaning and sanitizing infant feeding items”, background on sterilization and killing germs on an already-clean surface: https://www.cdc.gov/hygiene/about/clean-sanitize-store-infant-feeding-items.html
This analysis is based on published information from US CDC (Cleaning and sanitizing infant feeding items), US CDC (Cleaning and sanitizing baby bottles).
Frequently asked questions
How much water do I add to a bottle sterilizer?
Most electric steam sterilizers ask for a specific amount of water, usually marked with a line inside the base or measured with a cup that comes with the unit. Add exactly the amount stated in your model's manual, since too little water can stop the cycle from completing, and too much can overflow the base or lengthen heating and evaporation time.
Do I need to wash bottles before putting them in the sterilizer?
Yes, always. Sterilizing kills germs on a surface that's already clean, it isn't a substitute for washing off milk or food residue with water and soap. Wash bottles, nipples, and rings thoroughly first, then arrange them in the sterilizer for the cycle.
How long does a bottle sterilizing cycle take?
Cycle length varies by model and is listed on the product page on Amazon.ae or in the manual. Some combo units, like the Baby Brezza SuperQuick, are built around a relatively fast cycle for a full load, while steam-only sterilizers can be quicker for a smaller load since they skip the drying step entirely.
Can I touch sterilized bottles with my bare hands right after the cycle?
Avoid touching the inside surfaces of bottles and nipples with your bare hands, since oils and germs on your skin can recontaminate them the moment they come out sterile. Wash your hands well before handling the pieces, or use a dedicated tongs to lift hot parts out without touching the interior surface at all.
How long does a bottle stay sterile after the cycle?
We're not medical professionals, so always follow your model's manufacturer instructions and your pediatrician's guidance on how long a bottle stays sterile if left closed inside or outside the sterilizer. This detail varies between models and is usually stated in the included user manual.