
 Egypt
Egypt  Saudi Arabia
  USA
USA How to Clean a Water Dispenser, Step by Step
We may earn a commission from purchases through our links, at no extra cost to you. How we choose · Disclosure.
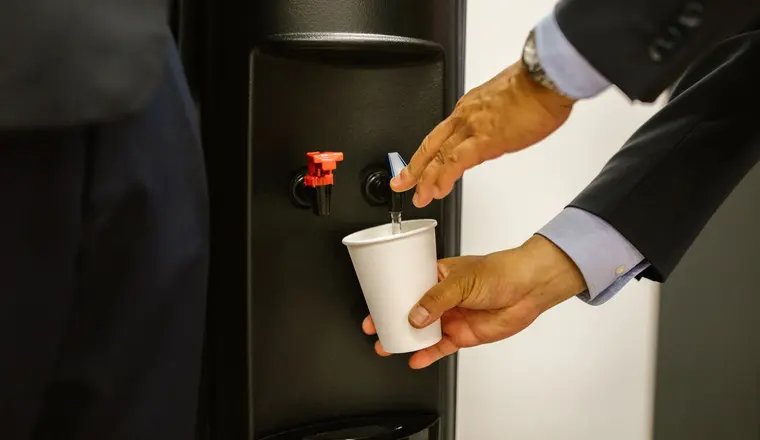
A water dispenser builds up mineral scale, and sometimes light mold around the internal tank and bottle cap area, especially if water sits still for a while or the unit isn’t cleaned regularly, which is what makes water taste off or gives off a faint smell even though the machine works normally. The fix is simple: wipe the outer parts weekly with mild soap, sanitize the internal tank with a diluted white vinegar solution every one to two months, and rinse well before you put it back together.
Never mix vinegar with bleach or any chlorine-based cleaner - the combination releases toxic gases. Use one cleaner at a time and rinse thoroughly between products.
The quick answer
Clean the removable outer parts (drip tray, bottle cap, tap spouts) weekly with mild soap and warm water, and sanitize the internal tank every one to two months with a diluted white vinegar solution, then rinse with two full tanks of clean water before fitting a fresh bottle. Mineral scale and mold grow where water sits still, not in the taps you use every day, which explains why the tap looks clean while the taste or smell still changes.
Key points
- A water dispenser is essentially a tank that holds a set volume of water that moves from the bottle to the taps (general background on water coolers from ENERGY STAR).
- Mineral scale forms from water sitting still inside the tank, not from heavy daily use.
- Mold grows in the warm, damp environment around the bottle cap area and its seal more than anywhere else (general background on mold from US EPA).
- Weekly outer cleaning prevents dust and bacteria buildup around the spouts and drip tray.
- Monthly internal tank sanitizing prevents most smell and taste problems before they start at all.
Why does a water dispenser need regular cleaning?
Unlike a kitchen tap where water flows continuously, water inside a dispenser sits in an upper tank, and often a separate hot tank, between uses. That stillness is what lets dissolved minerals in the water gradually settle on the tank walls and around the heating element, and lets the warm, damp environment around the bottle cap area become a suitable spot for light mold if neglected for a while. The UAE’s humid climate speeds this up a bit compared to a drier climate, which is why routine maintenance matters more than it might first seem.
Weekly cleaning steps for the outer parts
- Unplug the dispenser before starting any cleaning, especially near any wiring close to the washing areas.
- Empty the drip tray and wash it with mild soap and warm water, then dry it thoroughly.
- Wipe the bottle cap area and its seal with a damp cloth, since that spot is more prone to trapping moisture.
- Clean the tap spouts from the outside with a small soft brush to remove any visible residue or scale around the opening.
- Dry every part well before reassembling, since leftover moisture encourages mold growth.
Monthly sanitizing of the internal tank: the most important step
- Empty the current bottle or carefully remove it from its spot.
- Mix a diluted white vinegar solution (about a quarter cup of vinegar with a liter of warm water), or use a descaler made for water dispensers if one is available for your model.
- Pour the solution into the upper tank and let it run through the system to the taps, draining it into a bowl rather than drinking it.
- Let the solution sit in the tank for a few minutes so it reaches the corners of the tank and around the heating element.
- Rinse with at least two full tanks of clean water before fitting a fresh drinking bottle.
- Reassemble, and confirm every tap flows normally after the final rinse.
Do and don’t table
| Situation | Do | Don’t |
|---|---|---|
| Cleaning the taps | Small soft brush and mild soap | A metal pin or sharp tool to scrape scale |
| The internal tank | Diluted white vinegar or a descaler made for water dispensers | Concentrated chlorine or strong undiluted bleach |
| An empty bottle | Replace it as soon as it’s empty, or within a day | Leaving it empty or near-empty on the unit for days |
| Rinsing | At least two full tanks of clean water | Skipping the rinse or doing a quick one |
| Storage | Fully drying parts before reassembling | Fitting parts back while still damp |
Do you need a dedicated cleaning brush kit?
Most of these steps can be done with a regular dish brush and a cloth, and that’s enough for most homes. But dedicated water dispenser cleaning brush kits, with a long-handled brush that reaches the bottom of the tank and a narrower one for the tap spouts, make it easier to reach the tight corners a regular dish brush can’t get to easily, especially on bottom-load units with deeper openings. They aren’t necessary if you clean regularly and can already reach every corner with what you have in the kitchen, but they’re a cheap, practical add-on if you want an easier, faster clean every time.
A dispenser that’s easy to clean from the start
If you haven’t bought a dispenser yet, how easily it comes apart makes a real difference to your day-to-day experience. The Midea Top-Loading Water Dispenser, with 3 taps for hot and cold, is a practical example from our shortlist: its drip tray and removable outer parts wash easily, and its simple design means fewer corners where scale can hide. We didn’t pick it for being the cheapest, we picked it because the balance of price and easy maintenance makes sense, which is why it tops our guide to the best water dispenser in the UAE.
See the Midea Top-Loading Water Dispenser price on Amazon.ae ↗
When to stop and call a technician
- An odd taste or smell remains after the tank is sanitized and rinsed several times.
- Mineral scale still blocks a tap after soaking and gentle cleaning.
- The tank cannot be drained or reached for the cleaning steps described above.
- Any electrical housing has been exposed to water or no longer works normally.
Stop using the water dispenser and have it checked by a qualified technician before using it again.
Bottom line
Cleaning a water dispenser isn’t a luxury, it’s what keeps water tasting clean and extends the unit’s life. Wipe the outer parts weekly, sanitize the internal tank every one to two months with a diluted vinegar solution, and never leave a bottle sitting empty for days on the unit. If a strong smell is your actual problem rather than routine upkeep, read why does a water dispenser smell and how to get rid of it. And if the unit has stopped working entirely rather than just needing a clean, see water dispenser not working: what to check. For the full buying criteria, check how to choose a water dispenser or browse the full water dispensers section.
Sources
- ENERGY STAR, “Water coolers”,” general background on water dispensers and their internal parts: https://www.energystar.gov/products/water_coolers
- US EPA, “Mold, moisture and your home”,” general background on mold and the damp conditions it needs to grow: https://www.epa.gov/mold/brief-guide-mold-moisture-and-your-home
This analysis is based on published information from ENERGY STAR (Water coolers), US EPA (Mold, moisture and your home).
Frequently asked questions
How often should I clean my water dispenser?
The removable outer parts, like the drip tray, tap spouts, and bottle cap area, need a weekly wipe with mild soap and warm water. The internal tank, where water sits between refills, needs a deeper sanitize every one to two months with a diluted white vinegar solution, followed by a good rinse.
Is white vinegar safe for cleaning a water dispenser?
Yes, diluted white vinegar is safe on most water dispensers and effectively dissolves light mineral scale. Avoid concentrated chlorine or strong undiluted bleach, since it can damage internal parts or leave a strong smell, and always rinse with two full tanks of clean water after using any cleaning solution.
Why does the water still taste off after I've cleaned only the taps?
Because the source of scale and mold is usually the internal tank, where water sits still for a while, not the taps themselves, which get used daily and stay relatively clean. Wiping the external taps alone removes visible dust but doesn't reach what's built up deeper inside the tank, which is why the taste or smell persists even though the taps look clean.
Do I need to clean the dispenser every time I swap the bottle?
Not a full clean every swap, but wipe the bottle cap area and its seal with a damp cloth each time you change bottles, since that spot is more prone to trapping moisture and dust. Keep the full internal tank sanitize as a separate monthly routine instead of tying it to every bottle change.